Are you ready to discover the potential of your Mac when it comes to recording videos? Get ready, for an experience whether you’re a content creator, a budding filmmaker, or simply enthusiastic about capturing life’s precious moments in stunning high definition.
In this article, we will unpack the tools, tips, and techniques to video record yourself or your screen on Mac. We will cover everything from mastering built-in tools to discovering third-party applications.
So, get comfortable with your Mac, and let’s embark on a journey to unlock the complete potential of video recording!
Built-in Tools For Video Recording On Mac
Mac comes equipped with some fantastic built-in tools that make video recording a breeze. Let’s take a closer look at three gems: Photo Booth, QuickTime Player, and the Screenshot toolbar.
- Photo Booth
Think of Photo Booth as your personal mini studio. It’s perfect for those spontaneous moments or when you want to add a touch of fun to your recordings. To get started, simply open Photo Booth from your Applications folder. From there, you can choose different effects, backgrounds, and even play around with some entertaining distortions. Once you’ve set the stage, hit the red record button, and let the magic happen.
- QuickTime Player
Meet the undercover champion of video recording on Mac – QuickTime Player. Pre-installed in your Mac, it’s robust, flexible, and ready to roll. Navigate to the “File” menu within QuickTime Player, opt for “New Movie Recording,” and handpick your desired camera and microphone. Hit record when all is set, and QuickTime Player effortlessly captures your video with impressive clarity. It’s straightforward, reliable, and the go-to option for anyone in search of a seamless recording experience.
- Screenshot Toolbar
Don’t underestimate the Screenshot toolbar – it’s more than just a screenshot wizard; it’s a sneaky video recording tool too. Simply hit “Command + Shift + 5” to open it up. You can choose to record your entire screen or focus on a specific area. It’s a quick and efficient way to capture those impromptu moments without the need for a complicated setup. Once you’re done, your recording will be neatly saved in the location of your choosing. Easy, breezy video recording at your fingertips!
Tips For Video Recording Yourself On Mac
When you’re about to record yourself on MacBook, a few handy tips can make a world of difference. Let’s keep it friendly and conversational.
- Find Your Best Lighting Buddy
Good lighting is your best friend. Sit facing a window for that natural glow, or grab a desk lamp to illuminate your face. Avoid sitting with your back to a light source; it can cast shadows and make you look like you’re in a witness protection program. We want you to shine, not blend into the shadows!
- Tidy Up Your Background
A clutter-free background keeps the focus where it matters – on you! Check your surroundings and declutter anything distracting. A neat and tidy backdrop not only looks more professional but also makes you the star of the show.
- Webcam Eye Contact Magic
When speaking directly to your audience through your webcam, look into the camera. It creates a connection and makes it feel like you’re speaking right to them. It’s the virtual equivalent of maintaining eye contact in person – trust us; it works like magic!
- Mic Check, One, Two
Audio matters as much as the visuals. Invest in a decent microphone if you can, but if not, make sure you’re in a quiet space. Close those noisy tabs and kindly ask your neighbor to hold off on the drum practice for a bit.
- Master the Art of the Test Recording
Before diving into the main recording, do a quick test. Check your lighting and sound, and make sure your setup looks good. It saves you from potential “oh no, I had something on my face the entire time” moments.
- Relax and Be Yourself
Last but not least, be yourself! It’s your video, and authenticity goes a long way. Take a deep breath, relax, and let your natural charm shine through.
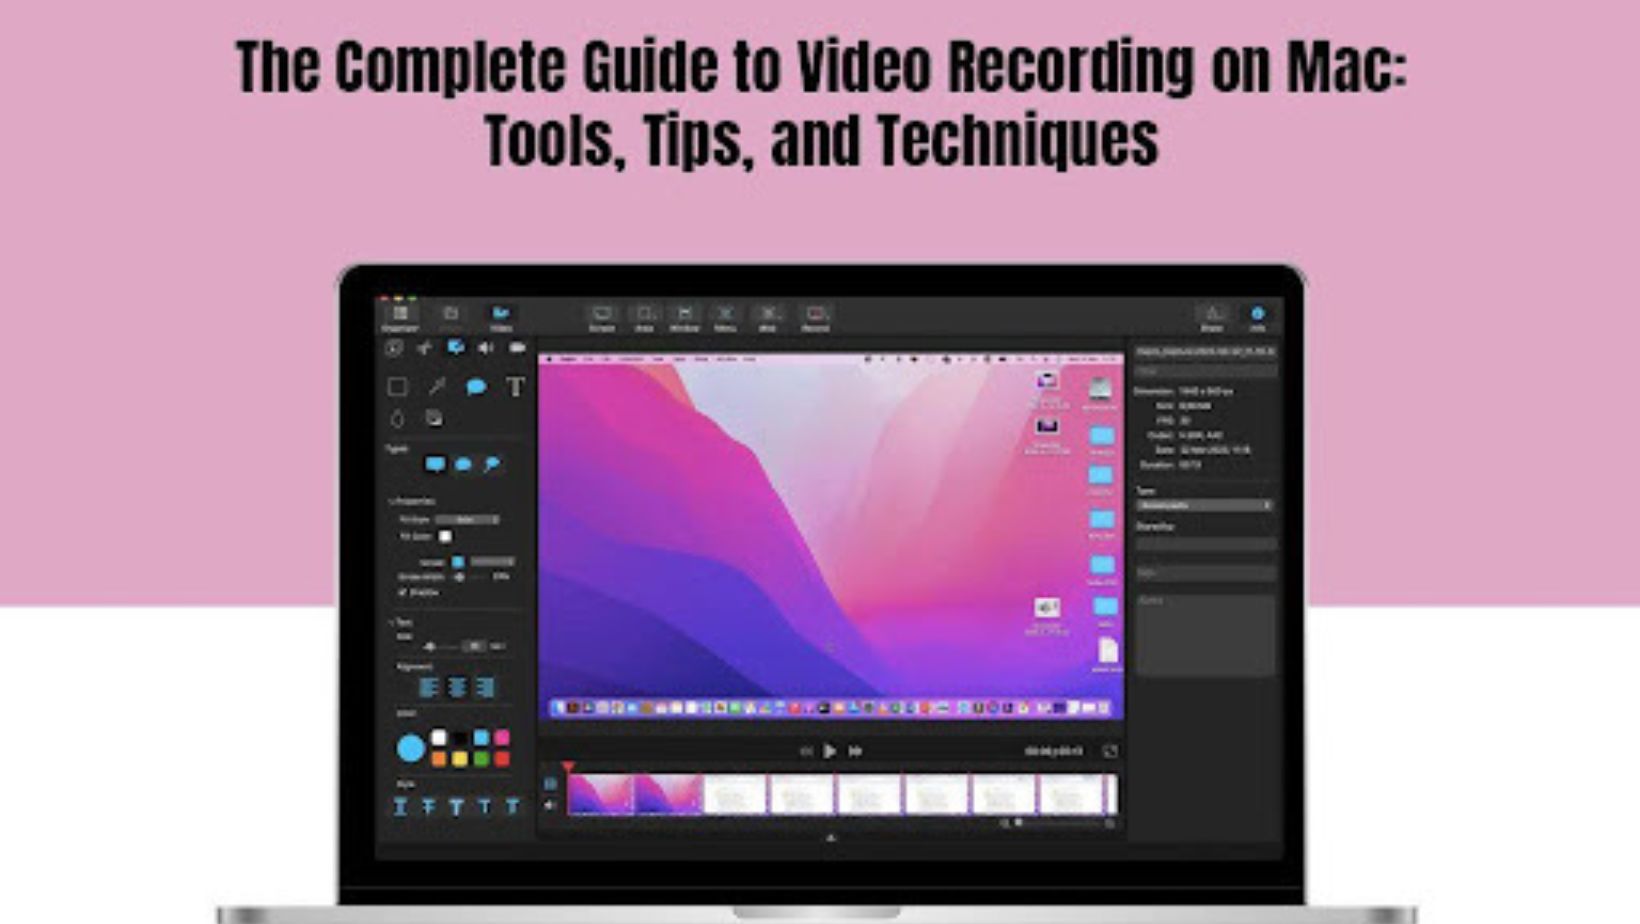
Video Recording On Mac Using Third-Party Apps
Discover a world beyond built-in tools with third-party apps for video recording on your Mac. These apps, like Camtasia or OBS Studio, bring a dash of creativity and advanced features to your recording game. Want dynamic overlays or seamless editing?
Third-party apps have your back. They often cater to specific needs, from professional productions to gaming streams, offering a personalized touch. Just head to the App Store or preferred website, pick an app that suits your style, and dive into a realm of enhanced functionalities. It’s like having a customized toolkit to turn your Mac into a powerhouse of recording possibilities!
Conclusion
Now there you have it – an exclusive behind-the-scenes guide to becoming a Mac video recording maestro! We’ve unraveled every tool, from the in-built wonders like Photo Booth and QuickTime Player to the clever Screenshot toolbar.
Your Mac is a powerhouse for screen captures, whether it’s yourself or your screen. And let’s not forget the creative allies that add flair to your recordings – third-party apps.
Armed with insights on lighting, background finesse, and the magic of webcam eye contact, feel free to confidently hit that record button. So, grab your Mac, unleash your creativity, and let the recording adventures begin!